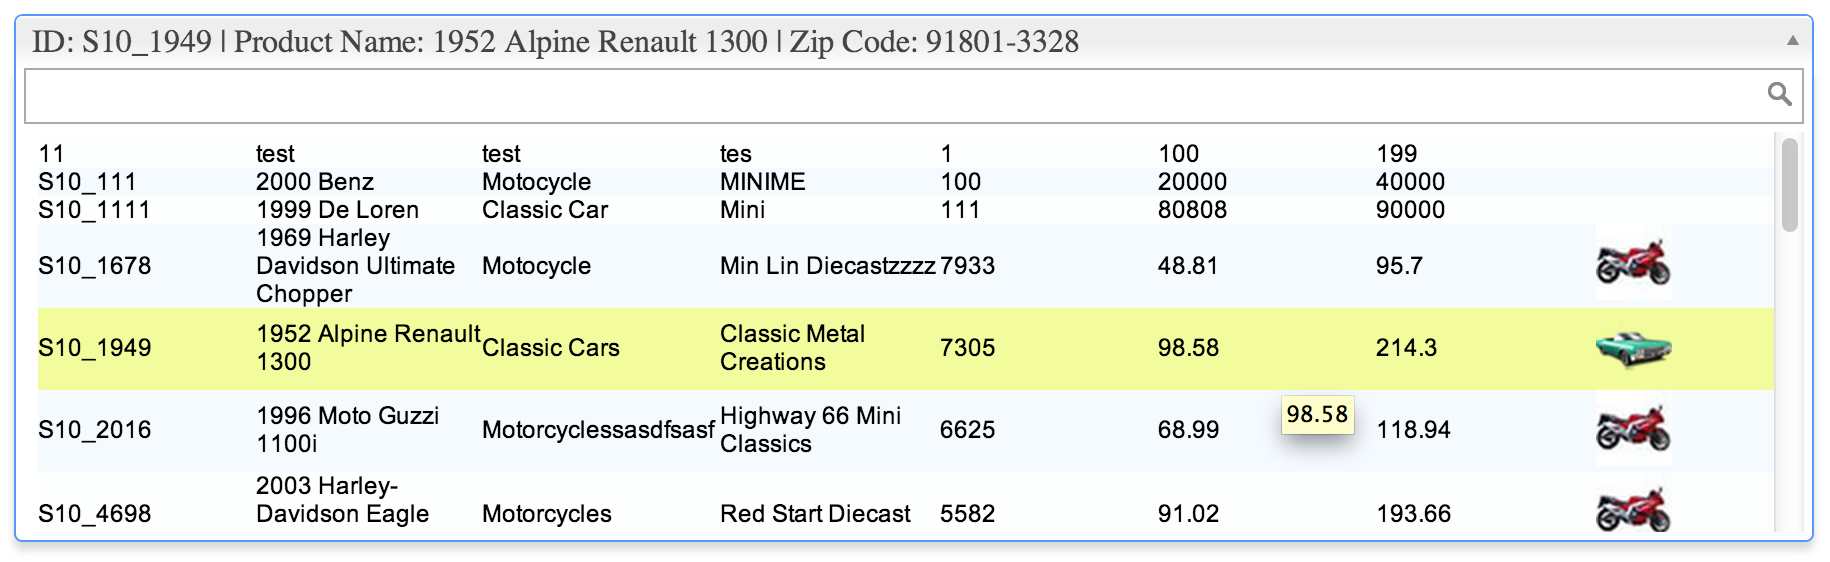
It is even possible to use datagrid generated by phpGrid as the dropdown template. It is currently an experiment feature.
Setup
Before start, You must acquire both phpGrid and phpAutocomplete You can download both Lite versions for FREE.
It’s important to install phpGrid and phpAutocomplete each in a separate folder. Below is the folder structure used in our example. phpGrid and phpAutocomplete resides in different folder inside phpGrid_phpAutocomplete under web root folder htdocs. This is RECOMMENDED folder hierarchy.
htdocs
+-- phpGrid_phpAutocomplete
|   |-- phpGrid
|   |   +-- conf.php
|   |-- phpAutocomplete
|   |   +-- conf.php
|   +-- phpGrid_template.php
Once folder structure is ready. Set up phpGrid SERVER_ROOT value and phpAutocomplete PAC_PATH value in each of their respective conf.php file.
phpGrid conf.php
define('SERVER_ROOT', '/phpGrid_phpAutocomplete/phpGrid'); phpAutocomplete conf.php
define('PAC_PATH', '/phpGrid_phpAutocomplete/phpAutocomplete/'); Programming
Now, we can move on to the actual integration. First all, include both conf.php files on top of the script.
require_once("phpGrid/conf.php");
require_once("phpAutocomplete/conf.php");
First of all, let’s create our datagrid first before it is used as a template inside the autocomplete as a dropdown.
$dg = new C_DataGrid("select * from products", "productCode", "products");
$dg -> set_col_title("productCode", "Product Code");
$dg -> set_col_hidden('productDescription')->set_col_hidden('productScale')->set_col_hidden('productUrl');
$dg -> set_col_img("Image", "/phpGridx/examples/"); // product image
$dg -> display();
Next, create our autocomplete control:
<?php
$pac_pg = new C_PhpAutocomplete('grid_template');
$pac_pg->set_width('900px');
$pac_pg->display();
?>
<input id="grid_template" type="hidden" />
The next step is to set the phpGrid as the template for autocomplete control. Now, how do we go about that? Well, it turns out that Select2 can also take Javascript object as the data property besides JSON data format. We will, again, use template method format_results() with a little bit Javascript.
$pac_pg->format_results('formatGrid');
formatGrid is a Javascript function defined below. The good news is that phpGrid has already done all the formatting for us, so inside the formatGrid, we simply pass our datagrid object that was created from the phpGrid that we created earlier.
// phpGrid has already formatted the grid, just pass the entire object
function formatGrid(obj) {
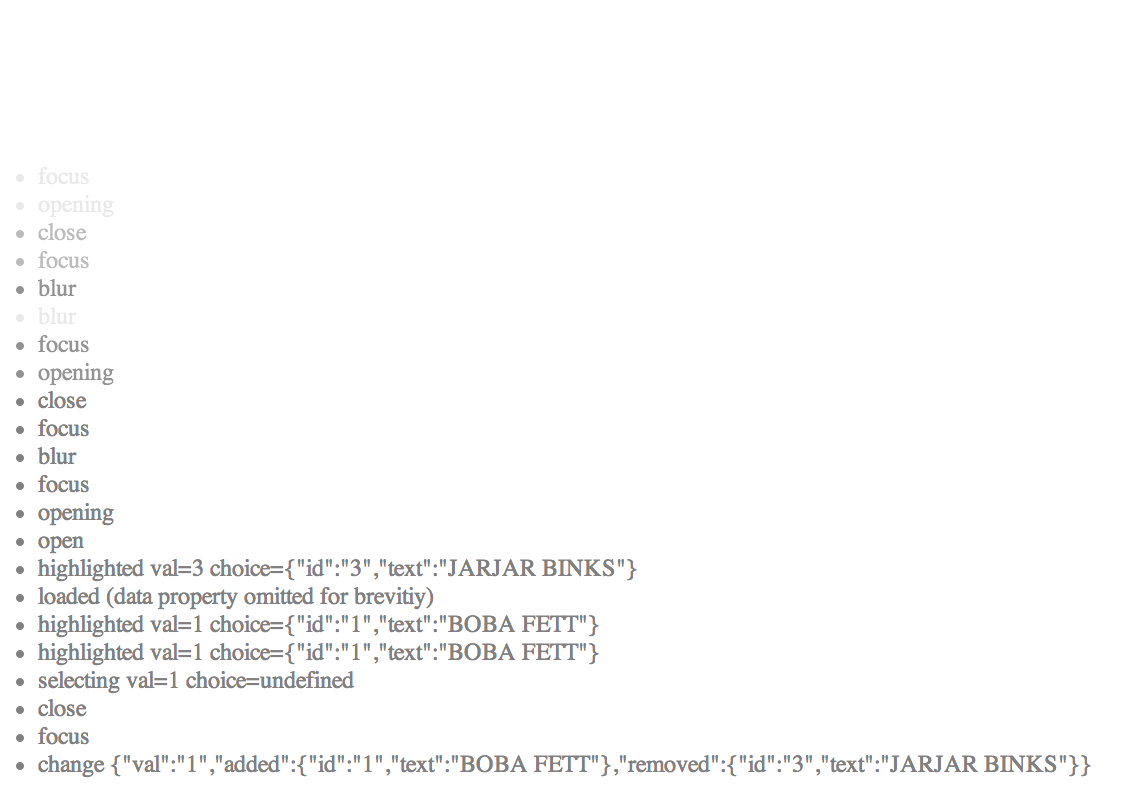
console.log(obj);
return phpGrid_products;
}
The next step is to make the datagrid template selectable inside the dropdown. We can’t do this with the usual format_selection() method because our template is an object encapsulates both data and display format. If you remember, phpGrid has an add_event() method that can be used to handle a number of events including “onSelectRow” event. Bingo!
Once we retrieve the data that we needed from the datagrid, remember to set the value and close the dropdown.
$onSelectRow = <<<ONSELECTROW
function(status, rowid)
{
$("#grid_template").select2("open");
productName = phpGrid_products.jqGrid('getCell',rowid,'productName');
zipCode = phpGrid_products.jqGrid('getCell',rowid,'supplierZip');
val = 'ID: '+rowid + ' | Product Name: '+productName + ' | Zip Code: '+zipCode;
$("#grid_template").select2("val", val); // set selected value
$("#grid_template").select2("close"); // close dropdown
}
ONSELECTROW;
$dg->add_event("jqGridSelectRow", $onSelectRow);
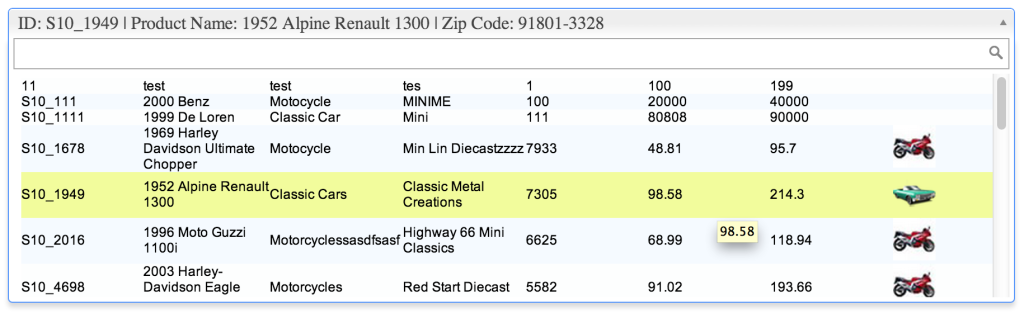
We are almost done. If you run the code right now, you will see that both datagrid and the autocomplete are displayed together on the same page. We don’t need to display the datagrid by itself. Let’s hide it using simple CSS.
<style>
/* must hide the grid from displaying by itself */
#gbox_products{display:none}
</style>
That’s it!
The COMPLETE sample code
<?php
require_once("phpGrid/conf.php");
require_once("phpAutocomplete/conf.php");
?>
<!DOCTYPE html>
<html>
<head>
<meta http-equiv="Content-Type" content="text/html; charset=utf-8" />
<title>test</title>
</head>
<body>
<h2>Datagrid Template</h2>
<style>
/* must hide the grid from display all by itself */
#gbox_products{display:none}
</style>
<script>
// phpGrid has already formatted the grid, just pass the entire object
function formatGrid(obj) {
return phpGrid_products;
}
</script>
<?php
$dg = new C_DataGrid("select * from products", "productCode", "products");
$dg -> set_col_title("productCode", "Product Code");
$dg -> set_col_hidden('productDescription')->set_col_hidden('productScale')->set_col_hidden('productUrl');
$dg -> set_col_img("Image", "/phpGridx/examples/");
$onSelectRow = <<<ONSELECTROW
function(status, rowid)
{
$("#grid_template").select2("open");
phpGrid_products.jqGrid("resetSelection");
productName = phpGrid_products.jqGrid('getCell',rowid,'productName');
zipCode = phpGrid_products.jqGrid('getCell',rowid,'supplierZip');
val = 'ID: '+rowid + ' | Product Name: '+productName + ' | Zip Code: '+zipCode;
$("#grid_template").select2("val", val);
$("#grid_template").select2("close");
}
ONSELECTROW;
$dg->add_event("jqGridSelectRow", $onSelectRow);
$dg -> display();
$pac_pg = new C_PhpAutocomplete('grid_template');
$pac_pg->format_results('formatGrid');
$pac_pg->set_width('900px');
$pac_pg->enable_combobox(false);
$pac_pg->display();
?>
<input id="grid_template" type="hidden" />
</body>
</html>
Check out the live demo! | Download Integration Example File 
Technical Notes
If the page throws an error like this:
This is because both phpAutocomplete and phpGrid have DEBUG constant, you need to comment out of them in conf.php
// define('DEBUG', true);